블로그 개설 과정
블로그 개설 과정
Theme
마음 같아서는 블로그를 직접 설계하고 싶지만, JavaScript 2주차 현재 지식수준으로는 어림도 없다는 것을 알기 때문에 여러 능력자분이 Github repository에서 배포 중이신 Jekyll-Theme를 이용했다.
내가 선택한 theme은 jekyll-theme-chirpy로, 심플하고 깔끔한 점이 좋아 블로그에 적용하게 되었다.
Modifying the feature
Theme를 Fork하여 내 repository에 복사한 후 다음과 같은 삭제/수정 작업을 진행했다.
Delete
/.github폴더에서workflows를 제외한 모든 폴더 및 파일 삭제- comment theme와 관련된 Contribute, 오류 보고 guideline 파일이므로 삭제하였다.
- comment theme와 관련된 Contribute, 오류 보고 guideline 파일이므로 삭제하였다.
/.github/workflows폴더에서commitlint.yml과pages-deploy.hook.yml을 제외한 모든 파일 삭제- comment github에서 Jekyll 사이트를 호스팅하면 automated deployment가 표준 기능으로 구현되기 때문에 자동으로 내 블로그에 변경사항이 적용된다. 따라서 automated deployment를 tigger하는 목적으로 만들어진
cd.yml,ci.yml을 포함해 모두 삭제하였다.
- comment github에서 Jekyll 사이트를 호스팅하면 automated deployment가 표준 기능으로 구현되기 때문에 자동으로 내 블로그에 변경사항이 적용된다. 따라서 automated deployment를 tigger하는 목적으로 만들어진
pages-deploy.hook.yml의 확장자에서 hook을 제거하여pages-deploy.yml로 변경(파일명 수정)- comment Webhook와 관련없이 Jekyll theme를 적용하기 위한 설정만 필요하므로 hook 기능을 삭제한다.
- comment Webhook와 관련없이 Jekyll theme를 적용하기 위한 설정만 필요하므로 hook 기능을 삭제한다.
_posts폴더에 있는 모든 md 파일 삭제- comment theme 제작자의 tutorial 파일로, 확인후 삭제하였다.
- comment theme 제작자의 tutorial 파일로, 확인후 삭제하였다.
modifying _config.yml
- url
_config.yml의url항목에 개설할 블로그 주소를 입력(필수)
1
2
  # fill in the protocol & hostname for your site, e.g., 'https://username.github.io'
  url: 'https://jelee-river.github.io'
- github
_config.yml의github항목에 내 github 프로필 명을 입력
1
2
  github:
  username: JeLee-river             # change to your github username
- social
_config.yml의social항목에 name, email, 기타 social 링크를 추가. 이때 name은 포스팅 글에 표시되며, 클릭 시 내 github으로 이동함. 나의 경우 별다른 SNS 계정이 없기 때문에 github 링크만 추가함.
1
2
3
4
5
  # It will be displayed as the default author of the posts and the copyright owner in the Footer
  name: Jeongeun Lee
  email: leeju1009@gmail.com             # change to your email address
  links:
    - https://github.com/JeLee-river       # change to your github homepage
modifying footer.html
<!--,-->처리/.includes/footer.html에서 아래의 코드를 주석처리하여 블로그 우측 하단에 표시되는 ‘Using the Jekyll theme Chirpy’ 제거. 구체적인 방법은 하얀눈길님의 블로그를 참고했음.
1
2
3
4
5
6
7
8
9
  <!--
      <div class="footer-right">
        <p class="mb-0">

       ... (@@ -31,6 +31,7 @@) 내용중략

        </p>
      </div>
    -->
Modifying the style
세부적인 style 요소를 수정했다.
sidebar
- avatar
_config.yml의avatar항목에 변경할 avatar(프로필) 이미지의 파일 경로 입력. 나의 경우/assets/img에 avatar 이미지를 저장함.
1
2
  # the avatar on sidebar, support local or CORS resources
  avatar: /assets/img/avatar.png # avatar file 경로 입력
- title
_sass/addon/commons.scss에서 Class Selector.site-title의 color를 수정하여 sidebar에 표시되는 블로그 title의 색상 변경
1
2
3
4
5
6
7
8
9
10
11
12
  .site-title {
    margin-top: 0.55rem;

    a {
      @extend %clickable-transition;

      font-weight: 900;
      font-size: 1.5rem;
      letter-spacing: 0.5px;
      color: rgba(54, 55, 72, 0.99); //색상 변경
    }
  }
- subtitle
_sass/addon/commons.scss에서 Class Selector.site-subtitle의 color를 수정하여 sidebar에 표시되는 subtitle의 색상을 변경. 원본 코드는 주석 처리하고 color, rgba 프로퍼티 값을 새로 추가함.
1
2
3
4
5
6
7
8
  .site-subtitle {
    font-size: 95%;
  //color: var(--sidebar-muted-color); 주석처리
    color: rgba(54, 55, 72, 0.99); //추가
  /*...
    중략
    ...*/
  }
- sidebar links & icon color
_sass/addon/module.scss에서 Class Selector%sidebar-links의 color를 수정하여 title을 제외한 sidebar의 font(links) 및 icon 색상을 변경함.
1
2
3
4
5
  %sidebar-links {
  color: rgba(249, 248, 247, 0.9); //색상 변경
  -webkit-user-select: none;
  -moz-user-select: none;
  user-select: none;
- image
- sidebar에 배경 이미지 삽입. 구체적인 방법은 하얀눈길님의 블로그를 참고했음.
1
2
3
4
5
6
7
  /* 원본 코드
  background: var(--sidebar-bg);
  */
  // sidebar 변경(추가)
  background: url(`/assets/img/sidebar.jpg`);
  background-size: 100% 100%;
  background-position: center;
- links
_data/contact.yml의twitter,rss항목을 주석 처리하여 sidebar 하단의 불필요한 social icon 제거
1
2
3
4
5
6
  #- type: twitter
  #  icon: 'fab fa-twitter'

  #- type: rss
  #  icon: 'fas fa-rss'
  #  noblank: true
favicons
블로그 접속 시 상단 탭에 노출되는 대표 이미지 변경. 원하는 이미지를
/assets/img/favicons의 favicon 파일에 덮어쓰기 함.favicon은 구글 검색으로 찾을 수 있는 여러 사이트에서 제작 가능함.
나의 경우 local에서 덮어쓰기 했을 때
favicon.ico의 썸네일이 update되지 않았음. 하지만 이와 상관없이 블로그에는 정상적으로 반영됨.
Tips
블로그를 수정하는 과정에서 어떤 file을 확인해야 하는지 파악할 때 DevTools(F12)를 활용한다.
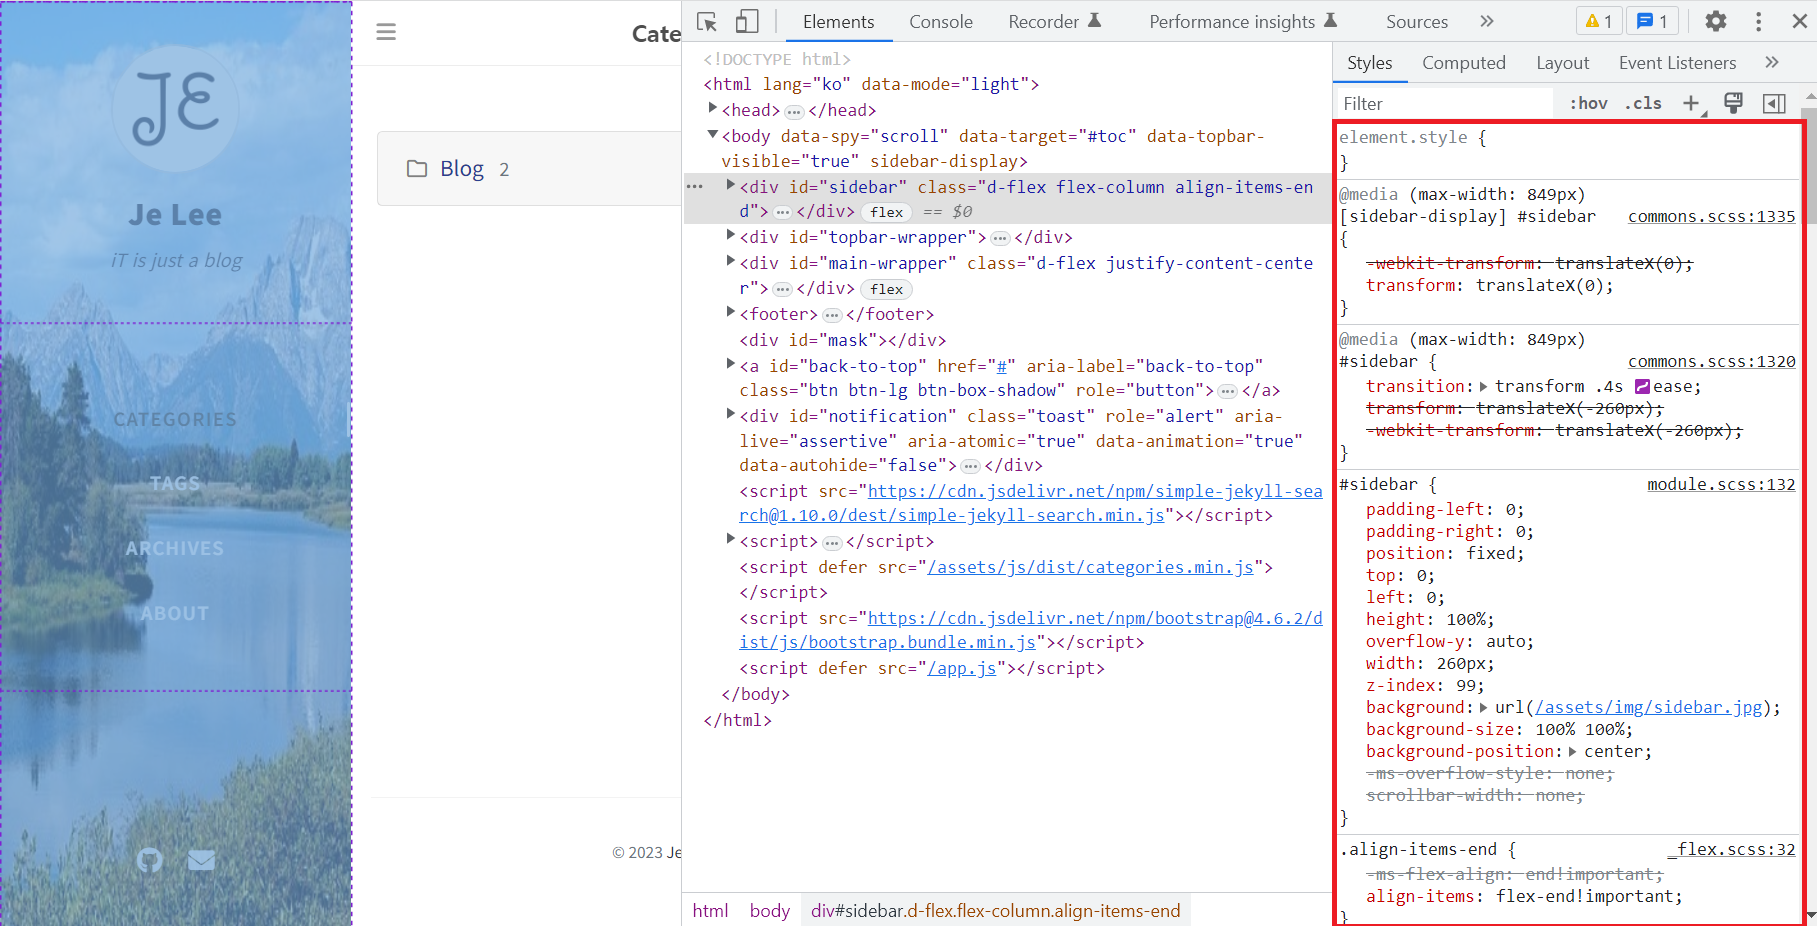 DevTools에서 Sidebar의 code를 확인하는 스크린샷
내 블로그에서 DevTools를 열고 확인하고 싶은 element의 html code를 누르면 관련 file과 code를 구체적으로 알려준다.
This post is licensed under CC BY 4.0 by the author.